How to properly annotate images?
Creating a high-quality annotated dataset is a fundamental step in developing AI models for object detection. This guide outlines how to properly annotate images using the OSAI editor, including best practices and tips for choosing the right annotation type.
1. Open the image editor
In the Dataset view, click on an image to open the image editor and begin annotating.
The interface includes:
- A top panel to navigate between images, return to the dataset view, and view a category usage counter.

- A right-hand menu with tools to add or change classification/detection categories, delete the image, move the image using arrows, zoom in and out, and access shortcuts.

2. Choose annotation mode
At the bottom of the editor, select the annotation mode:
Basic mode – annotate one object at a time.
Automatic mode – apply the same label continuously to multiple objects.

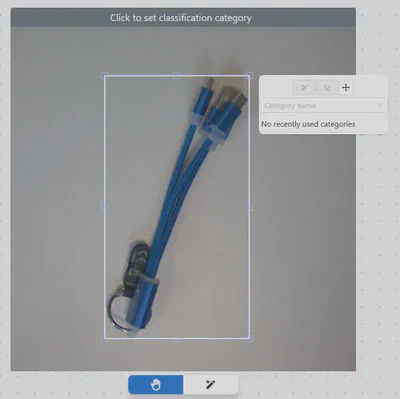
3. Add bounding boxes or polygons
To add a bounding box, click and hold the left mouse button, then drag to draw a box around the object. Release the button to open a pop-up window where you can name the annotation (select an existing label or create a new one), adjust its size or position, or delete it using the trash icon or the Delete key.
To add a polygon, click around the object to mark points that form a precise outline.
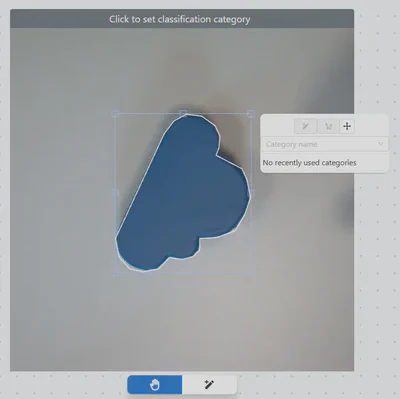
Use bounding boxes for quick labeling of regularly shaped objects and in cases where high precision is not required. Use polygons to create detailed contours and to annotate complex, irregular shapes.
4. Handling overlapping annotations and set object direction
When annotations overlap, selecting the one you want may be difficult. You can resolve this in two ways:
Click one of the options in the pop-up window next to the annotation: put the label on the top of the canvas or put the label on the back of the canvas.
Right-click on another label. This will move it to the bottom so you can select the one you are interested in.

Each annotation includes a directional arrow by default. Moving this arrow sets the object’s orientation angle, which is particularly important when labeling moving objects.
![]()
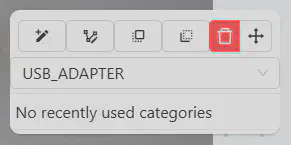
5. Edit or delete annotations
To modify an existing annotation, click on it to open the pop-up window. From there, you can:
Change the label (select another category or create a new one),
Adjust the size or position of a bounding box,
Edit polygon points by dragging them,
Delete the annotation using the trash icon or the Delete key.
Make sure to review each annotation carefully to ensure accuracy.
6. Save your work
Annotations are saved automatically when you make changes. You can safely move to the next image without losing your work.

If your internet connection is unstable, double-check that each annotation is saved before proceeding.
Conclusion
Accurate and consistent annotations are essential for training reliable AI models. Use bounding boxes for quick labeling and structured objects, and polygons for detailed shapes. Check for overlapping annotations and specify object direction if necessary. The quality of the dataset has a direct impact on the performance of the AI model, so add annotations carefully and check your work regularly.