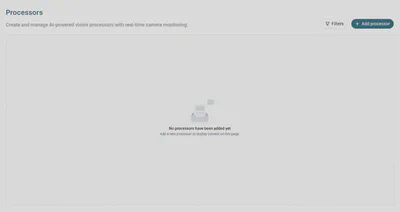
How to use processors?
A processor is a module that uses AI models to analyze data from cameras or videos and perform specific tasks, such as frame capture, monitoring, or controlling robotic systems in real time.
Frame saver
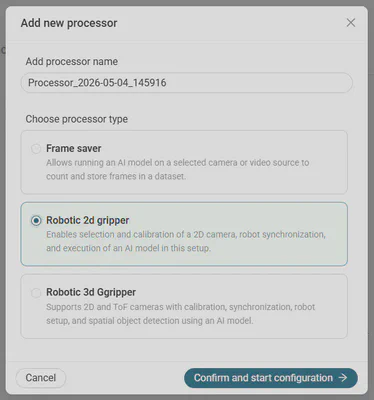
To add a processor, go to the Processors section and click Add processor.
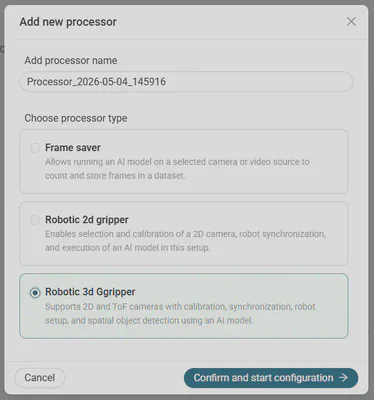
Add a processor name and select the type. First we will do Frame saver. Click Confirm and start configuration.

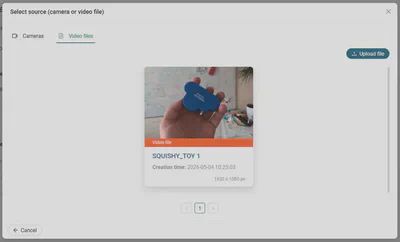
Select a source. You can choose a camera or a video file that will be used for the configuration. We will use a video.
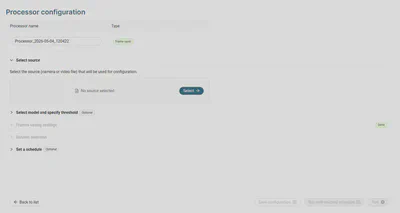
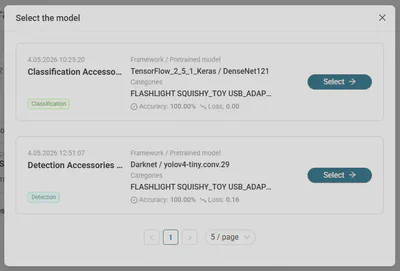
Select model and specify threshold (only for detection models). We will use a detection model.
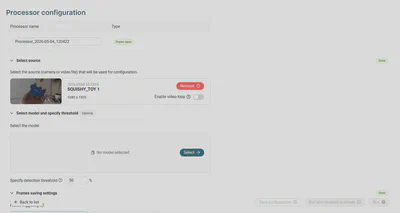
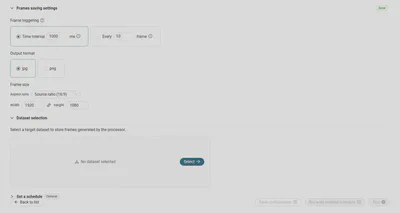
Configure the frame-saving settings. You can set how frames are captured by choosing either a time interval or capturing every specified number of frames. Select the output format (JPG or PNG), and adjust the frame size by choosing the aspect ratio or set the width and height.
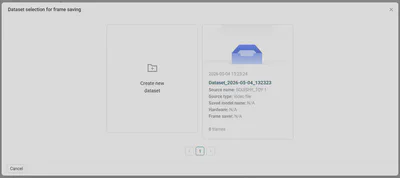
Select a target dataset to store frames generated by the processor. Click Select and create a new dataset.
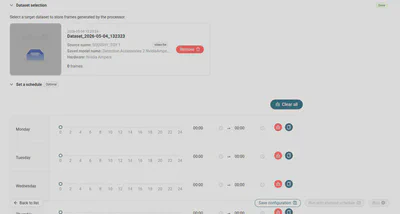
An optional step is to set a schedule that defines when the processor should run.
Click Save configuration and Run or Run with enabled schedule.
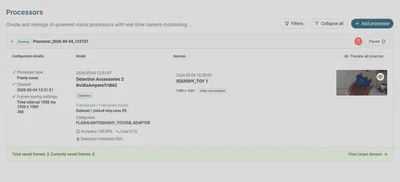
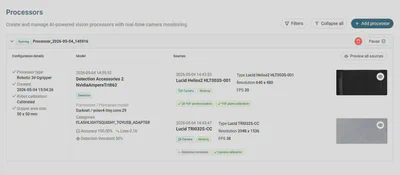
In the Processors view, you can pause the processor, delete it or edit it while it is paused.
Robotic 2d gripper
Click Add processor and select Robotic 2d gripper. Click Confirm and start configuration.
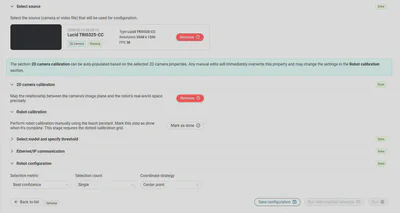
Select a source. You can choose a camera or a video file that will be used for the configuration. We will use a camera.
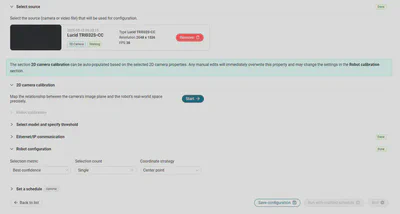
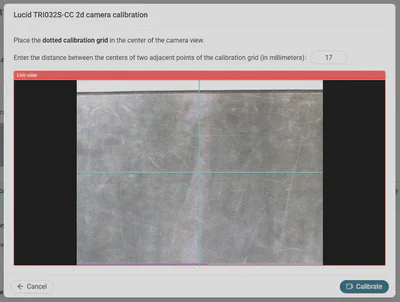
The next step is 2d camera calibration to precisely map the relationship between the camera’s image plane and the robot’s real-world space. You can choose how you would like to perform the camera calibration process:
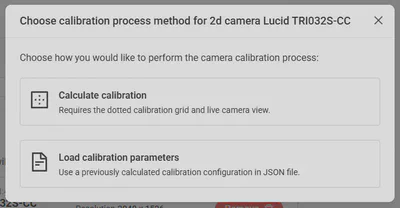
- Calculate calibration - Requires the dotted calibration grid and live camera view.
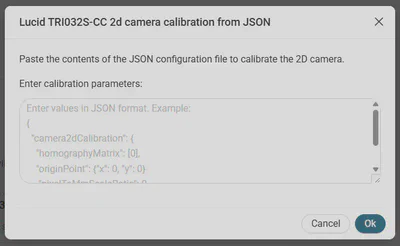
- Load calibration parameters - Use a previously calculated calibration configuration in JSON file.
Now it is time to perform robot calibration manually using the teach pendant. Once completed click Mark as done.
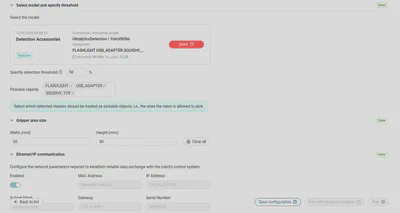
Select model, specify threshold (only for detection models) and select pickable objects. We will use a detection model.
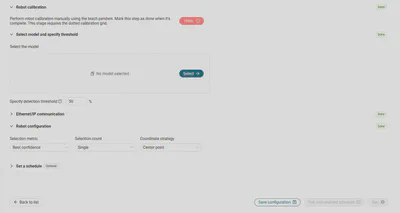
Configure the network parameters required to establish reliable data exchange with the robot’s control system. An optional step is to set a schedule that defines when the processor should run. Click Save configuration and Run or Run with enabled schedule.

In the Processors view, you can pause the processor, delete it or edit it while it is paused.
Robotic 3d gripper
Click Add processor and select Robotic 3d gripper. Click Confirm and start configuration.
Select a source. You can choose a camera or a video file that will be used for the configuration. We will use a camera.
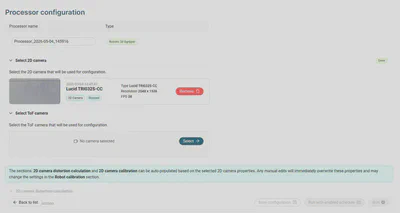
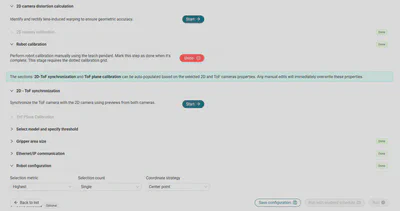
Select the ToF camera and start 2d camera distortion calculation.
Choose how would you like to apply distortion correction to camera:
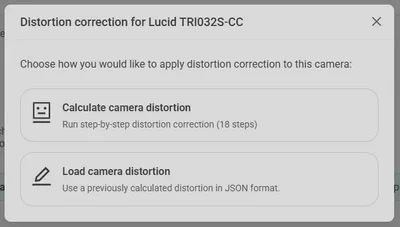
- Calculate camera distortion - Run step-by-step distortion correction
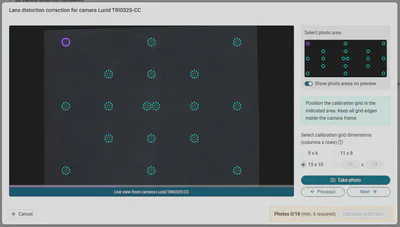
- Load camera distortion - Use a previously calculated distortion in JSON format
Now it is time to perform robot calibration manually using the teach pendant. Once completed click Mark as done.
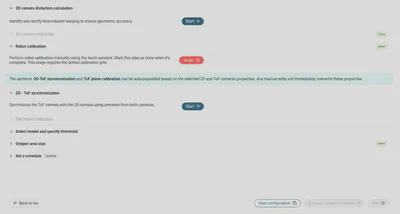
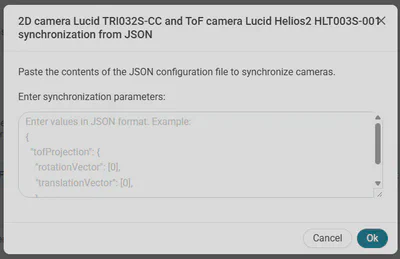
The next step is 2d - ToF synchronization. You can choose how would you like to perform the cameras synchronization process:
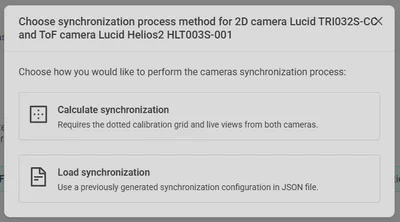
- Calculate synchronization - Requires the dotted calibration grid and live views from both cameras
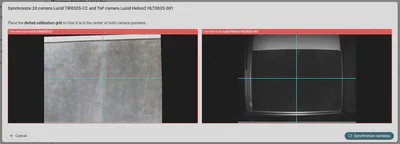
- Load synchronization - Use a previously generated synchronization configuration in JSON file

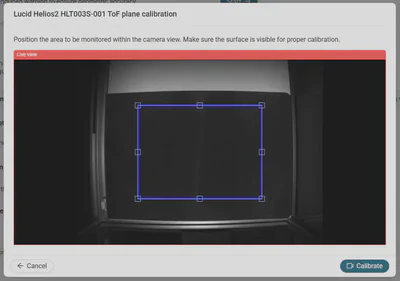
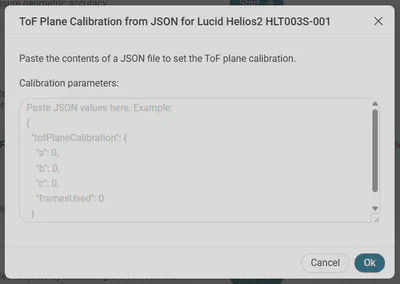
Perform ToF Plane calibration. You can choose how would you like to perform it:
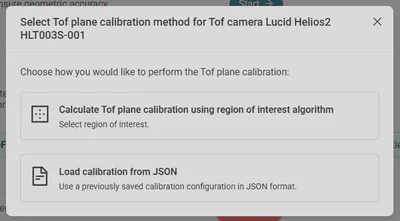
- Calculate ToF plane calibration using region of interest algorithm - Select region of interest
- Load calibration from JSON - Use a previously saved synchronization configuration in JSON file
Select model, specify threshold (only for detection models) and select pickable objects. We will use a detection model. Set the Gripper area size.
Configure the network parameters required to establish reliable data exchange with the robot’s control system. An optional step is to set a schedule that defines when the processor should run. Click Save configuration and Run or Run with enabled schedule.
In the Processors view, you can pause the processor, delete it or edit it while it is paused.